Welcome to our new Toon Boom How To series!
We are giving artists the tips, tricks and techniques to bring their amazing visions to life in Storyboard Pro and Harmony. Got something you want us to cover? Let us know on Twitter, Facebook, and LinkedIn or browse the Toon Boom Learn Portal for an immediate answer.
Today, we spoke with Toon Boom animation specialist Geneviève Demers about how to import and use 3D references in a 2D scene in Toon Boom Storyboard Pro storyboarding and preproduction software. Why would an artist want to do that?
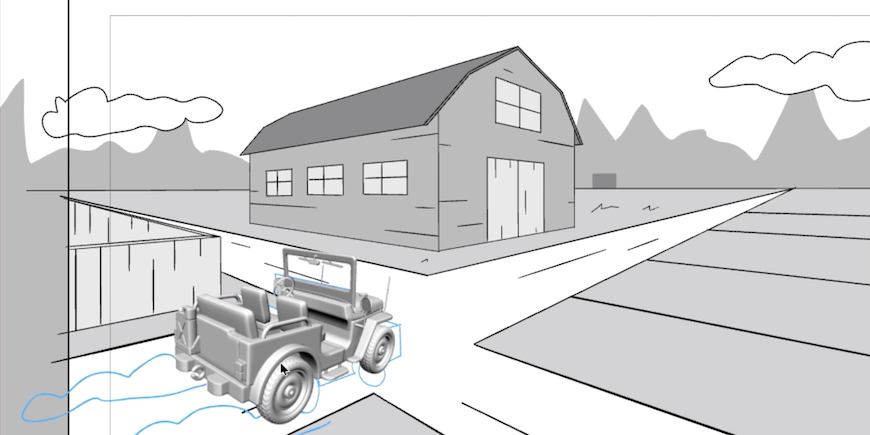
In Storyboard Pro, 3D models can be imported directly into the scene and rendered as flat 2D images. This technique for importing references is popular among freelancers and studios, and helps when drawing backgrounds, cars and complex machinery in perspective. By using a 3D model as a reference and rendering it into 2D bitmap, you can also avoid concerns about the three-dimensional depth of the scene.

While you can have layers nudged in Z space, 2D layers can sometimes collide with the 3D surfaces, which can be challenging to manage. Depending on the desired results, moving the camera or the 3D layers can also completely alter the scene. Again, rendering the 3D models as bitmaps solves this issue.
When using 3D models as a reference and rendering them in 2D in two-dimensional scene, you get the same look as if you had drawn on a flat surface with the assistance of Storyboard Pro’s light table feature.
Pro tip from our trainer Gen: “In most cases, using the 3D features in Storyboard Pro and Toon Boom Harmony usually work best with props, background objects and vehicles rather than characters.”
Watch the below training video from our Learn Portal module Activity: Using a 3D Object as a Reference in a 2D Scene.
Steps to import and use 3D references in a 2D scene
1. First, import the 3D reference model into your Project Library. In the Library view, right-click on the 3D Models library folder, then select Import Files. Locate and select your 3D model and click Open.
2. Drop your 3D model into your 2D scene. You will be asked if you want to use the 3D model or render it in 2D. Select the option to Render in 2D. (Note: this command will only appear if your scene is set to 2D — see how to do that here.)

3. Before the 3D model is rendered in 2D, you will be able to position it in the Render 3D Model window. You may move the slider to zoom in and out (Ctrl + Shift on Windows or Shift + ⌘ on Mac OS X) and then click and drag on the preview area to rotate your model. You can also move around by holding down the space bar. When you are happy with your adjustments, select Render to Scene.
4. This will produce a rendered 2D image, which can be scaled and transformed like any other bitmap layer in Storyboard Pro. Use the Layer Transform tool to position the rendered image wherever you would like to place it in the scene.

5. Open the Layers panel and create a new vector drawing layer above the rendered 2D image, and turn on your light table by selecting View > Light Table from the menu bar (or use the flattened 3D layer as it is).
6. Draw your panels and go!


